How To Install CCTV Cameras step by step ? We will instruct security cameras in the 7 Simple Steps below, it helps you do it your self to install and set up the security cameras perfectly.
➥ Installing CCTV Cameras with 7 Simple Steps
You’ve finally purchased a security camera system and now it’s time for installation. If you’re a bit overwhelmed, we’ve got you covered. This simple how to install a security camera guide is going to simplify the process. In the past, the complexity of home security systems often required professional installation and setup.
With the growth of DIY home security, homeowners, renters, and small business owners can easily add a security system. Installation requirements vary by system complexity, from stand-alone plug and play wire-free security cameras, to complex multi-camera security systems.
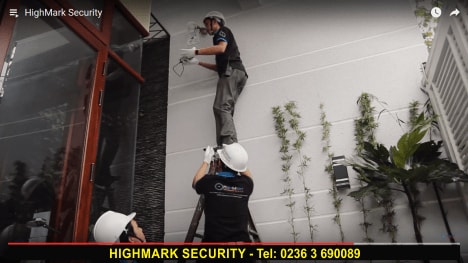
HighMark Security team of security experts will help you learn how to install security cameras, including where to place the cameras, as well as overall installation tips.
Planning is Key
- Before we dive into the technicalities of how to install a security system, we need to first discuss preparation. Planning isn’t just about making the installation easier, but to ensure that your security system fits your property’s security needs.
- Many people make the mistake of beginning their planning after they have already purchased a security system. Instead, start with a security checklist and an assessment of your current security status. The purpose of this process is to determine your security vulnerabilities and identify key access points. Use this information to determine what size and type of security system will address your needs.
- Another essential factor to consider during the planning phase is to take some time to think about what type of security camera you need. From indoor and outdoor cameras, to wired and wireless, there are many choices to choose from.
Planning – Wiring Considerations
- Most wired security camera systems include the necessary cabling. However, the length of cabling needed can impact what type of security system you install. For standard DVR systems, you’ll need coaxial cables which can result in degraded image quality after about 300ft/90m.
- NVR systems require Ethernet cables such as cat5e and cat6. Ethernet cables have more flexibility as network switches can be used to extend the cable length without impacting image quality. Make sure you use high-quality cables, as it can affect the distance at which you can install a camera and still have seamless functionality with no signal loss.
- Keep in mind that DVR systems usually require more installation time than NVR systems due to the larger cable required. Not sure on why and how DVRs and NVRs differ? Use this blog to understand the difference between DVRs and NVRs during the planning stage.
What You’ll Need
The first step in connecting your CCTV is the obtainment of all the necessary equipment and the right CCTV system. HighMark Security can offer our clients a large array of choices when selecting a CCTV security system, and if you need assistance one of security technology product specialist can help identify the right system for your location’s specific needs. The materials you will require for your CCTV installation will include:
- CCTV Cameras (however many you need)
- Bullet Cameras
- Indoor Dome Cameras
- Vandal Dome Cameras
- Pan Tilt Cameras
- License Plate Cameras
- Hidden Cameras
Read more: Top 10 CCTV Camera Brands 2018 Global Ranking by Asmag
- Appropriate CCTV Cables – To connect Cameras to DVR (the most common being the Siamese Cable has RG59 type coaxial cable bonded with 2 strands of 18 gauge wire)
- DVR/CCTV Recorder
- Monitor(s)
- Monitor Cables (such as VGA)
- LAN Cable (if connecting directly to the internet)
- Appropriate Power Supply Cables and Source
- Mouse (if connecting directly to DVR. otherwise you will need a computer to control and configure your system)
As you go through the installation process, you might decide to use other tools to make things a bit easier depending on your specific situation, but the things listed above are the basics that you’ll need.
The Installation Process by 7 steps
How Wired Camera Systems Are Set Up
- Before you dive deep into installing a wired security camera system, you first have to understand how everything is connected.
- Pretty much every system consists of a set of cameras and a DVR box that serves as the user interface for managing the entire system, as well as storing all of the video footage that gets recorded.
- All of the cameras connect directly to the DVR box, either using BNC cable for analog camera systems, or ethernet cable for digital systems. If you have an analog system, I highly recommend skipping the BNC cable and getting special adapters called baluns, which allow you to use Ethernet cables—they’re a lot easier to install and more modern overall.
- Since the cameras directly plug into the DVR box, this means that if you install a camera by your back patio and the DVR box is upstairs in your home office, you’ll need to route the camera’s cable through your house in order to connect it to the DVR box, which can get a bit complicated, depending on how your house is built how exactly you plan to route the cable.
- From there, the DVR box gets plugged into a power outlet and then you connect an external monitor to the DVR box to manage the entire system, see a live view of all the cameras, and review past recordings. Most systems will also come with a mouse, but a keyboard is also recommended.
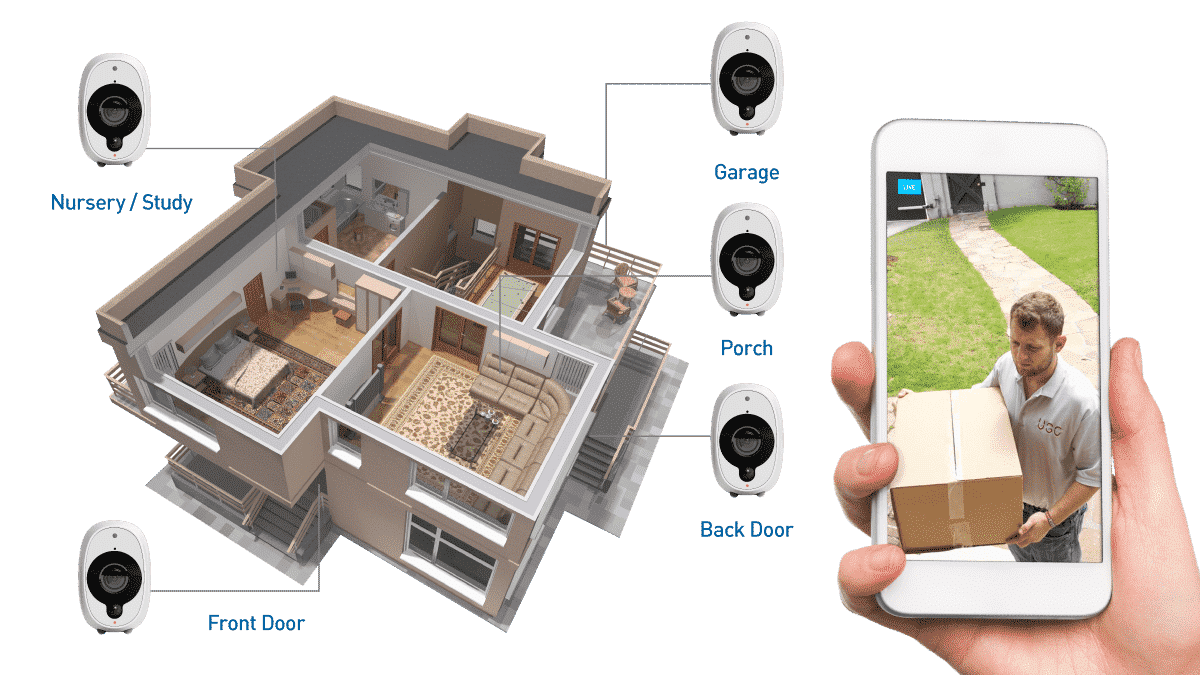
Step One: Figure Out Where You Want to Place Security Cameras
The most optimal security camera placement depends on your property. However, there are some universal tips that everyone should follow. After all, if installed in the wrong area, a security camera can be relatively useless.
Whether you’re placing your security cameras inside or outdoors, the main tip is to focus on specific areas of interest. Think back to your security assessment – the path leading up to your front and back doors (home or business), the different ways people access the building, and any blind spots. In some cases, you may need multiple cameras to capture specific areas.
A general rule of thumb is to install the security camera at a downward angle to allow for accurate motion detection. It’s important to note, this won’t always be necessary, especially if you’re using a wide angle dome camera.
At a bare minimum, you will want at least one camera covering your front door, and potentially one monitoring your backdoor, as these are often the primary points of entry. Windows with ground floor access are also key points of vulnerability and could be monitored with cameras, window sensors, or both. Keep in mind that the gate or garage (if applicable) are also primary access points to a house or business and should be monitored as well. Security coverage of all access points should be maintained so that you can be alerted if someone attempts to enter your property.
When it comes to installing wired security cameras, it’s not enough to pick just any spot and mount them. You have to think about what makes the most sense as far as ease of installation (and if it’s even possible to install a camera where you want it).
For example, it would be great to have a camera mounted on the outside wall next to your front door in the upper corner, but you have to think about how you’re going to route the cable from the camera all the way to the DVR box. That is your limiting factor when it comes to installing the cameras.
So instead of mounting it on an outside wall, perhaps mount it on your front porch’s ceiling. From there you can run the cable through the porch’s own little attic and then up into the main attic, taking it wherever you want from there. Obviously, you’ll have the best judgement on this, but it’s something you’ll need to keep in mind.
Step Two: Prepare the Camera Installation
Depending on where exactly you install your cameras, you may need some different tools than what I use. For instance, I’m just drilling through wood, drywall, and aluminum, so a regular power drill and some basic drill bits will work fine. However, if you have to drill through brick or other masonry, you’ll likely want a hammer drill with some masonry drill bits.
In any case, start by marking a hole where the camera’s cable will feed through, as well as holes for where the camera’s mounting screws will go. Some kits will come with a template sticker that makes the job a lot easier. If yours doesn’t come with these, hold the camera up to the wall or ceiling where you want it and mark the holes with a pencil.
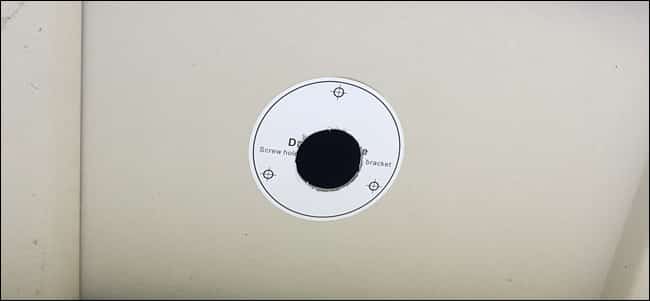
Get your power drill and a drill bit and drill pilot holes where the mounting screws will go. Then drill the bigger hole in the center that the cable will feed through. Usually you have to use a spade bit for the bigger hole, but you might be able to find a regular drill bit that’s big enough.
Step Three: Run Cables to Each Camera Location
Once you have holes drilled for your cameras, it’s time to run cable to each of your camera locations. This is also where the order of things might be different for you based on your situation, but essentially you’ll be drilling holes either through walls or ceilings in order to feed cables to where you need them to go.
For my installation, all of the cameras’ cables will converge in the attic above my garage, and from there they’ll all feed up into the main attic above the second floor. So to start, I’m going to take cable and feed various lengths out to the edges where my cameras will be. This is a lot easier to do if you have steel fish tape—it’s very difficult to physically locate yourself around the edge of your attic, since that’s where your roof slopes down and creates a very cramped space to work in. So to solve that, fish tape will be your best friend.
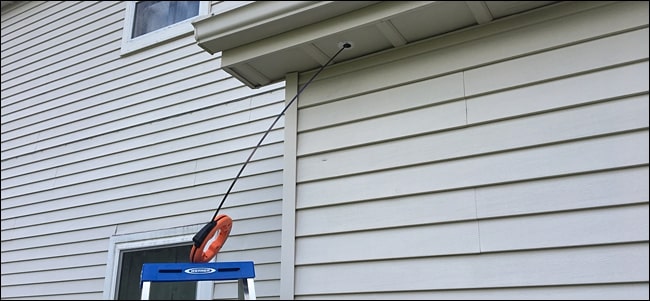
Once the fish tape extends far enough into the attic for easier access, tape the end of the cable to the fish tape and pull on the fish tape from the outside to thread the cable through the hole you drilled. This job is a whole lot easier with a friend helping you.
Next unwrap and remove the fish tape, and your cable will be ready to hook up to your camera when you’re ready to install it. If you’re using ethernet cable, you might have to crimp your own connectors on if they’re not already installed.
Step Four: Run the Cables to the DVR Box
- Once you have all of the cable runs located where each camera will be, it’s now time to route all of those cables to the DVR box.
- You’ll likely need your fish tape for this again, as well as your power drill to drill holes through walls or ceilings. This is where things can become a bit complicated, so if you’re not quite sure where to start, maybe phone that friend if you haven’t already.
- Essentially, I’m routing the cables from my garage’s attic up to the main attic that’s a floor higher. This requires a hole to be drilled in the garage’s attic wall, plus a second hole in the main attic to feed the cables all the way through. However, I got pretty lucky with my cable runs, since the path I wanted to take with all of the cables was already cleared by previous cables runs, so I didn’t have to drill any new holes through studs or walls. You may not be so lucky.
- After all that, I’ll drill a hole in the ceiling in my closet to feed the cables down through that hole where they’ll meet the DVR box.
- How you mount the DVR box is completely up to you. Most will have mounting holes on the back, similar to what power strips and surge protectors have. You can also just have it sit on a desk or tabletop of some kind.
- Fish tape will be required to pull cables through all walls and ceilings, and you may end up taping cables to the fish tape, pulling them through, removing them, and repeating the process several times through multiple walls before the cables finally arrive to their destination.
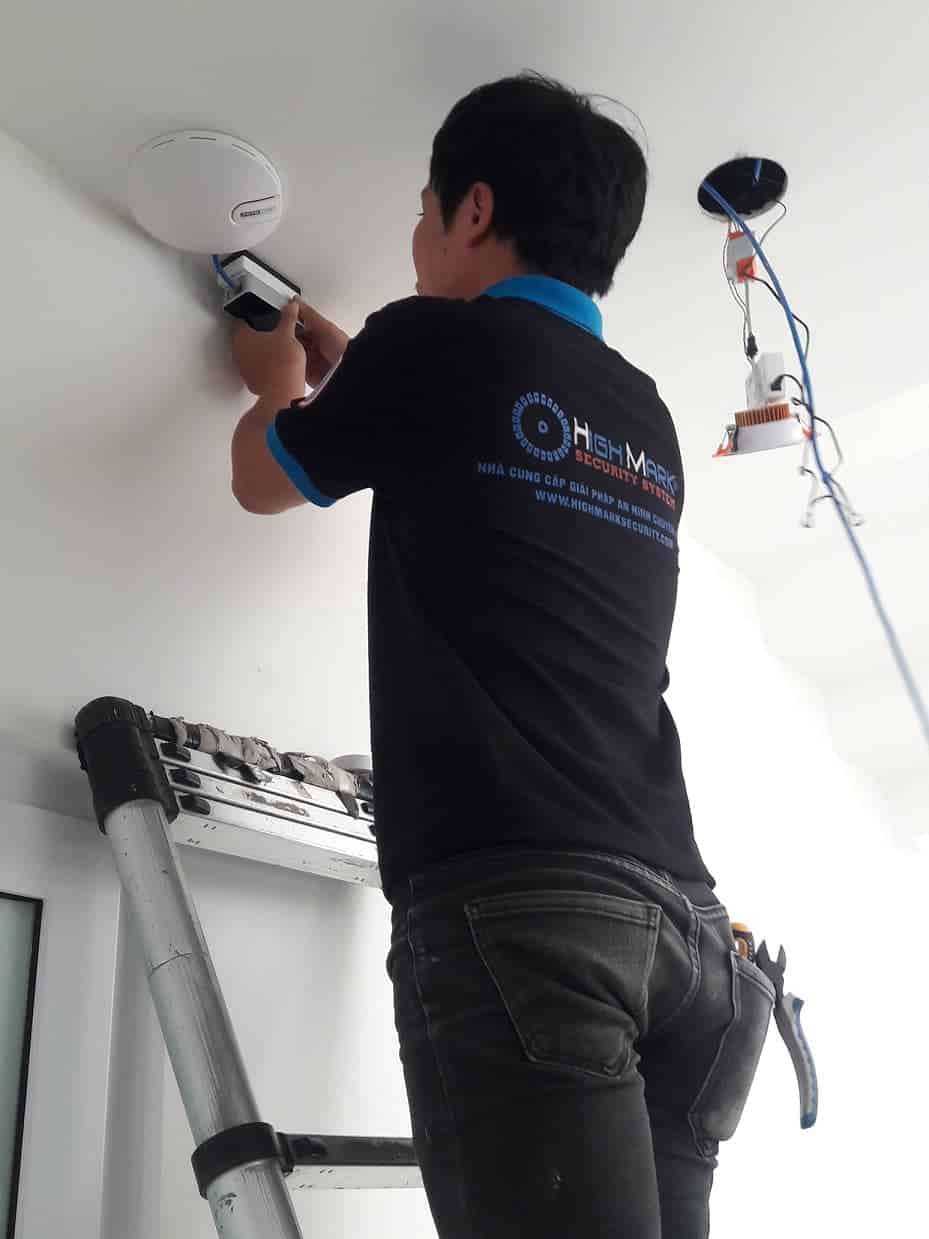
Step Five: Install the Cameras
- Things get a lot easier from here, since running the cables is definitely the most difficult part. Installing the cameras should only take a few minutes each.
- Start by connecting the cable coming out from the hole to the camera itself. Then feed the excess back up into the hole.
- If you want, you can wrap the connection with electrical tape to secure it so that it doesn’t get unplugged by accident.
- Next, grab the mounting screws that came with your kit and use your power drill to mount the camera to your house.
- After the camera is installed, you can then make some rough adjustments to the camera by loosening the adjustment screws and then tightening them back up when all adjustments have been made. Keep in mind that you’ll likely need to make finer adjustments once you can actually see the live view of the camera, so you’re not entirely done with this step just yet.
Step Six: Connect Everything Together
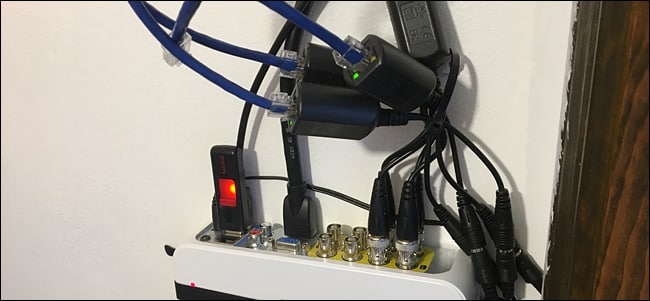
- Once the other end of the cables are completely routed through your house, you can begin connecting them to the DVR.
The connections should be pretty easy, and as you can see, I’m using those special adapters that I mentioned further above. Just connect each cable to its own port, and then connect the external monitor to the DVR box, as well as the mouse and keyboard. You can also keep a USB drive plugged in for when you need to export any footage in the future.
Step Seven: Set Up the User Interface
- This is where things can be different for you depending on what camera system you have, but the setup process is likely similar across the board.
With my system, the user interface setup consists of creating a password, setting the date and time, and going through a quick tutorial on how it all works.
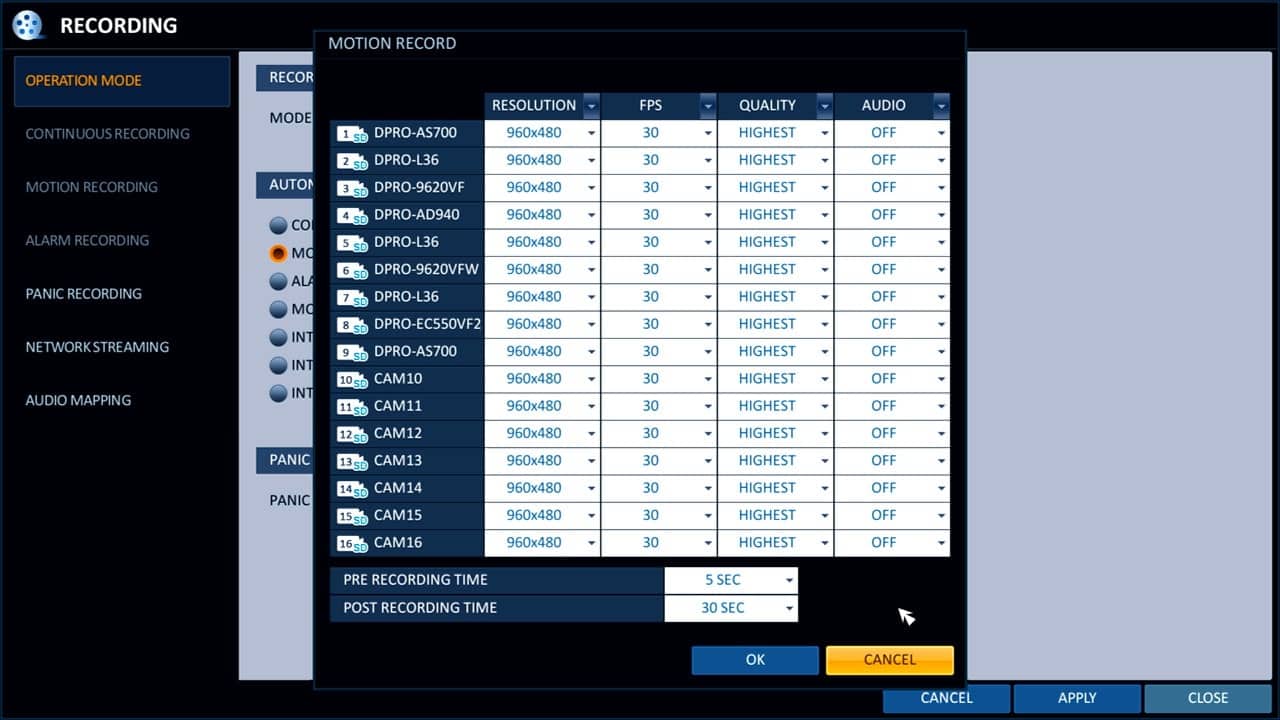
From there, you’re good to go, but taking some time to navigate through the settings to customize some things is recommended, like whether or not your cameras should record 24/7 or only during motion, for example. Your system may also have video settings that you can tinker with to make the image quality a bit better.
Revealing more: 10 secretsmethods to hack security cameras from hackers
How to Install Security Cameras Outdoors
Placing security cameras outdoor has a few additional and unique considerations:
-
Avoid backlighting and lens flare
- Backlighting occurs when there is a very bright light which bleeds the footage out resulting in a very pale, almost white image.
- Backlighting can be created by any bright light such as the sun, security light, or street light.
- Reflection from the sun or other lights can cause lens flare which results in circles or dots on your security footage.
- Make sure to face the security camera away from direct sunlight to avoid poor security footage.
-
Mount the security camera out of reach
- Make sure you position the cameras where they are hard to reach. You don’t want easy access to the camera, as an intruder could easily break or disarm it.
- However, be careful not to mount the camera too high as this can inhibit your ability to identify people caught on camera.
-
Check Wi-Fi connection strength*
- The further from your router the camera gets, the more difficult it can be to achieve an adequate signal. As such, check your signal strength at each camera location. If the signal is weak or dropping out, you can install a Wi-Fi extender or try these tips to optimize your Wi-Fi signal.
- *Note: This only applies to Wi-Fi connected cameras.
-
Be aware of privacy implications
- Make sure you know the surveillance laws in your county, state, and country. Although most U.S. states don’t have any specific laws around surveillance, make sure security cameras do not point inside a neighbors property—this is an invasion of privacy.
Common Security Installation Question – Should the camera be visible?
Although this is most commonly asked for outdoor security cameras, it can pertain the indoors as well, especially for businesses. A study of convicted burglars asked them to explain what they would do as a homeowner to remove the bullseye from their home, and one of the most ubiquitous tips was to ensure that there’s a visible camera on the property. As such, a common practice is to install a ‘mock’ security camera for the visible deterrent and have hidden cameras as well.
Security Camera Installation Pro Tips
- Check access to power outlets (not applicable for wire-free security cameras)
- Before finalizing the camera location, connect the camera to the recorder to ensure everything works correctly.
- When mounting a security camera, measure and check twice before drilling any holes.
- Check camera angle and security footage throughout the installation process
- You will want to confirm if the security camera is actually in the most optimal location and not leaving any blind spots. For example, it may seem like the camera is facing the right direction but you may not see certain obstructions or issues until you look at the actual camera view.
- With HighMark Security, you can use our smartphone apps to see the camera view during the installation process.
- Many companies offer installation services or can recommend professionals.
Summary – Where to Install Security Cameras
- Focus on specific areas.
- Monitor entry and exit points – including a gate or garage if applicable. The front & back doors are the most important.
- Angle camera at a downward angle.
- Use multiple cameras to cover blind spots.
- Place the security cameras out of reach.
- Check for lighting issues that may impact image quality.
The most important thing to remember when installing your security system is to take your time, plan ahead, and don’t be afraid to ask for help.
Once you have your camera system officially up and running, take a look at the video feeds and decide if any of the cameras need adjusting. As described further above, use those small screws on the camera to adjust the positioning to where you want it. Hoping with 7 Simple Steps to helping DIY easily.